
Azure Service Fabric offers two modes of operation: stateful and stateless. Both implementations allow for microservice-style application development. This tutorial focuses on building a simple, stateful microservice; that is, a microservice that maintains a degree of state between calls such that underlying objects retain their properties’ state after a client applies changes to the object.
Why Stateful
Stateful services provide the best of both worlds in terms of scalability and reliability. Azure Service Fabric encapsulates the scaling process to a great degree, by handling virtualisation and hardware-provisioning. The framework also handles load-balancing, failover, and state-synchronisation. The following is a step-by-step guide to implementing the simplest stateful service possible with Azure Service Fabric. The guide assumes that you have completed the steps involved in configuring your development environment.
1. Create a new Azure Service Fabric project
Create a new Azure Service Fabric project called “MyApplication”, selecting the Stateful Reliable Actor type from the list of available templates:

Stateful Reliable Actor Template
2. Add Custom Method Stubs
Locate the ISimpleActor” interface and note the existing method stubs. This interface and associated implementation is created automatically and includes two built-in method stubs. Add the following stubs so that the interface includes a “Name” property accessor and modifier:
    public interface ISimpleActor : IActor
    {
        Task<int> GetCountAsync();

        Task SetCountAsync(int count);

        Task<string> GetNameAsync();

        Task SetNameAsync(string name);
    }
Note that all method stubs are asynchronous by default. We have added two new methods; a simple name property accessor and modifier.
3. Add Name Property to State
Locate the ActorState class and modify so that the class includes a “Name” property:
        [DataContract]
        internal sealed class ActorState
        {
            [DataMember]
            public int Count { get; set; }

            [DataMember]
            public string Name { get; set; }

            public override string ToString()
            {
                return string.Format(CultureInfo.InvariantCulture, "SimpleActor.ActorState[Count = {0}]", Count);
            }
        }
4. Add Custom Methods
Add the following implementation methods to the SimpleActor class so that it satisfies the ISimpleActor interface:
        public Task<string> GetNameAsync()
        {
            return Task.FromResult(State.Name);
        }

        public Task SetNameAsync(string name)
        {
            State.Name = name;
            return Task.FromResult(true);
        }
5. Manage in Service Fabric Explorer
Deploy the application using Visual Studio:
Build -> Deploy Solution
Note that the application is now running locally in Service Fabric Explorer:

Azure Service Fabric Cluster Manager
6. Create Proxy Client
Add a new Console Application to the solution and install the Microsoft.ServiceFabric.Services NuGet package:
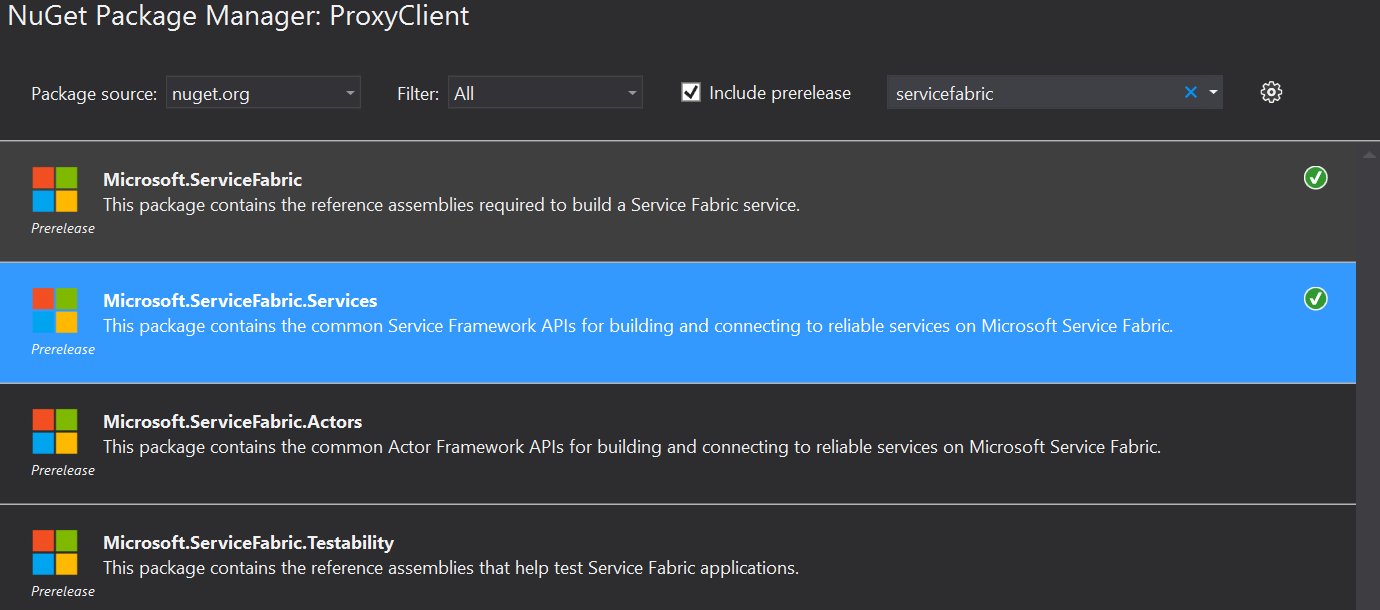
Azure Service Fabric NuGet Package
Note: You may need to change the Target Framework property to 4.5.1, and also the Platform Target to X64:

Modify Target Framework

Modify Platform Target
Finally, include a reference to the SimpleActor.Interfaces project, and add the following to the Main method in the Program class:
            var actorId = ActorId.NewId();

            var simpleActor =
                ActorProxy.Create<ISimpleActor>(actorId, "fabric:/MyApplication");

            simpleActor.SetNameAsync("Bob");
            var name = simpleActor.GetNameAsync();

            Console.WriteLine("Hello, " + name.Result);
            Console.ReadLine();
Summary
Run the program and observe that the text “Hello, Bob” is printed to the command window. The Name property retains its state across calls. Subsequent accessor calls to the SimpleActorService will return the value “Bob”, unless that value is explicitly modified. Note that the value is synchronised across all running instances and nodes.
Connect with me:
