Tag Archives: csharp

New Relic Insights .NET Client

Fork me on GitHubNew Relic.NET

A lightweight C# client for New Relic Insights

  • Upload New Relic Insights events on-demand
  • Upload in batches, as a scheduled task
  • Minimal CPU usage (1 thread)
  • Proxy-aware

Upload a Single Event

Create the Event

Create a class that implements NewRelicInsightsEvent:

public class CustomNewRelicInsightsEvent : NewRelicInsightsEvent
{
	[JilDirective(Name = "name")]
	public string Name { get; set; }

	[JilDirective(Name = "count")]
	public int Count { get; set; }

	[JilDirective(Name = "unixTimeStamp")]
	public int UnixTimeStamp => 
           (int) DateTime.UtcNow
                 .Subtract(new DateTime(1970, 1, 1))
                 .TotalSeconds;

	///
	/// EventType is the New Relic Insights Event Grouping. It determines the
	/// database to which the event will persist.
	///

	///
	/// /// must be serialised
	/// in Camel case, in order to be correctly interpreted by New Relic
	/// Insights.
	/// /// /// Apply the following attribute to the
	///
	/// property in your implementation:
	/// /// /// [JilDirective(Name = "eventType")]
	/// ///
	[JilDirective(Name = "eventType")]
	public string EventType { get; set; }
}

Note: NewRelic.NET leverages Jil for serialisation. Though JilDirective attributes are not required for custom properties, the EventType property requires the specified JilDirective.

Initialise New Relic Metadata

NewRelicInsightsClient.Instance.NewRelicInsightsMetadata.AccountID = 
	"{New Relic Account ID}";
NewRelicInsightsClient.Instance.NewRelicInsightsMetadata.APIKey = 
	"{New Relic API key}";
NewRelicInsightsClient.Instance.NewRelicInsightsMetadata.URI =
	new Uri("https://insights-collector.newrelic.com/v1/accounts");

Upload the Event

New Relic Event Upload

    var customNewRelicInsightsEvent = new CustomNewRelicInsightsEvent
    {
        Name = "TEST",
        Count = id,
        EventType = "Test"
    };

Synchronously

    NewRelicInsightsClient.Instance.UploadEvents(
	new NewRelicInsightsEvent[]
	{ 
		customNewRelicInsightsEvent 
	}, 
	new HttpClientFactory());

Asynchronously

    NewRelicInsightsClient.Instance.UploadEventsAsync(
	new NewRelicInsightsEvent[]
	{ 
		customNewRelicInsightsEvent 
	}, 
	new HttpClientFactory());

Upload Events in Batches

New Relic Batch Upload

Start the Event Cache

if (!NewRelicInsightsClient.Instance.HasStarted)
{
	NewRelicInsightsClient.Instance.Initialise();
}

Add Events to the Cache

NewRelicInsightsClient.Instance
    .AddNewRelicInsightEvent(customNewRelicInsightsEvent);

Event Upload Frequency

Batch-upload occurs every minute, by default, unless a custom frequency is specified. The following example sets the upload-frequency to 10 minutes:

NewRelicInsightsClient.Instance.RecurringTaskInterval = 10;

Proxy Server

The following example indicates that a proxy should be leveraged when invoking HTTP requests to New Relic:

NewRelicInsightsClient.Instance.NewRelicInsightsMetadata
    .UseWebProxy = true;
NewRelicInsightsClient.Instance.NewRelicInsightsMetadata
    .WebProxy = new WebProxy(“127.0.0.1:8080”);

Custom HTTP Timeout

Outbound HTTP requests to NewRelic are restricted to a specific timeout (5 seconds) as follows:

NewRelicInsightsClient.Instance.NewRelicInsightsMetadata
    .UseNonDefaultTimeout = true;
NewRelicInsightsClient.Instance.NewRelicInsightsMetadata
    .NonDefaultTimeout = new TimeSpan(0,0,5);

Otherwise, the default C# HttpClient-timeout applies.

Restricting Batch Upload Size

The default batch-upload size is 1,000 events. That is, a batch consisting of no more than 1,000 events will be uploaded upon each cache upload-cycle. The following example indicates that the entire cache should be emptied upon every upload-cycle:

NewRelicInsightsClient.Instance.NewRelicInsightsMetadata
    .CacheUploadLimit = int.MaxValue;

Connect with me:

RSSGitHubTwitter
LinkedInYouTubeGoogle+

HSTS Supercookies with ASP.NET

Fork me on GitHub
HSTS, or HTTP Strict Transport Security is essentially a means of ensuring that your connection is secure. It is a feature of modern browsers that is designed to prevent, for example, man-in-the-middle attacks, where you request a secure resource, such as https://mybank.com, and are redirected by a malicious 3rd party over a non-secure connection, to http://mybank.com. Note the missing “s” in the 2nd URL Scheme.

How HSTS Works

Browsers typically solve this problem by storing security preferences in a small data structure. In its simplest form, this is a key-value pair index, where the key is the resource URL and the value is a boolean variable indicating whether or not the connection to the associated resource should be established in a secure manner:

_____________________
 google.com    | 1 |
 bing.com      | 1 |
 apple.com     | 1 |
 ____________________

Note that the above example indicates that all requests to google.com, bing.com, and apple.com should be made in a secure manner, over HTTPS. We can infer then, that entries that do not exist in the HSTS database can be said to allow non-secure connections. If we were to view this in tabular-format, it would resemble the following, where entries for both http://yahoo.com and http://wordpress.com do not exist in the browsers HSTS database:

_____________________
 google.com    | 1 |
 yahoo.com     | 0 |
 bing.com      | 1 |
 wordpress.com | 0 |
 apple.com     | 1 |
 ____________________

When read as a single value, the complete sequence of boolean values for this table reads as “10101”. It is therefore possible to leverage this table to store arbitrary binary values.

However, it is the sights themselves that determine whether or not they should be accessed over a secure connection or not. This is achieved by returning a HTTP 301 response to requests established over non-secure channels. The HTTP response also includes a reference to the secure URL. The browser will honour this response by redirecting to the secure URL, which returns the following HTTP Header:

Strict-Transport-Security: max-age=31536000

Note that the above max-age parameter may be set as required; the above is simply an example.

The browser, upon receiving this response, will add an entry to its HSTS database, indicating that all future requests should be established over a secure channel.

How to Hack HSTS

In order to “save” a binary value to the HSTS database, we need to control the URL entries that will reside within the database. Let’s assume that I own the following 4 domains:

1.supercookies.com
2.supercookies.com
3.supercookies.com
4.supercookies.com

I configure each of these sites to indicate the connections should only be established over secure channels. Imagine then, that I create a website that contains a JavaScript file that creates a random 4-digit binary value – in this case, “1010″.

In order to “save” this value, my JavaScript file should contain a function that connects to both 1.supercookies.com and 3.supercookies.com. This will create the following entries in the HSTS database:

_____________________________
 1.supercookies.com    | 1 |
 3.supercookies.com    | 1 |
_____________________________

We can infer from this that taking into account both other domains, out view of each domain expressed in tabular format might represent the following:

_____________________________
 1.supercookies.com    | 1 |
 2.supercookies.com    | 0 |
 3.supercookies.com    | 1 |
 4.supercookies.com    | 0 |
_____________________________

In other words, by implementing a custom endpoint in each domain that simply returns a boolean value indicating whether or not the inbound HTTP request is secure or not will indicate to us whether or not there is an entry in the browsers HSTS database for that domain. For example, if we invoke a connection to http://1.supercookies.com (note the non-secure HTTP Scheme) then we would expect the browser to force a redirect to the secure equivalent of that URL (https://1.supercookies.com). Thus, if out endpoint returns a positive boolean, we can infer that this domain is present in our browsers HSTS database. Otherwise, the domain is not present, and our endpoint will return a negative boolean. By establishing connections to each domain, we can build a series of boolean values; in this case, “1010“.

Practical Example with ASP.NET Web API

Add the following ASP.NET Web API Controller method to write an entry to the HSTS database for the domain that hosts your ASP.NET application:

public HttpResponseMessage Write()
{
    HttpResponseMessage response;

    if (Request.RequestUri.Scheme.Equals("https"))
    {

        response = Request.CreateResponse(HttpStatusCode.NoContent);
        response.Headers.Add("Strict-Transport-Security", "max-age=3153600");

        return response;
    }

    response = Request.CreateResponse(HttpStatusCode.MovedPermanently);
    response.Headers.Location = new Uri(Request.RequestUri.AbsoluteUri.Replace("http", "https"));

    return response;
}

In simple cases, the above method simply returns a HTTP 301, that indicates to the browser to redirect to the secure equivalent of the origin URL. Upon redirecting, the browser receives the HSTS Header that results in an entry in the HSTS database for the domain that hosts your ASP.NET application.

Add the following method in order to read the HSTS entry (if present) for the domain that hosts your ASP.NET application:

public class HSTSResponse
{
    public bool IsSet { get; set; }
}

public HSTSResponse Read()
{
    if (Request.RequestUri.Scheme.Equals("https"))
    {
        return new HSTSResponse
        {
            IsSet = true
        };
    }
    return new HSTSResponse();
}

This method returns a positive boolean value if the inbound HTTP request is secure, implying that the upstream browser contains an entry in its HSTS database for the domain that hosts your ASP.NET application.

Generating Tracking IDs


It is not necessary to compile or run the source code – simply browse to the included index.html file in order to demonstrate the process. You can, of course, run the application locally if you wish.

The complete code leverages 4 external websites, as per the above example, in order to generate a binary value and indirectly store it in the HSTS database. Leveraging 4 external websites yields a total of 24 possible unique values – hardly enough to constitute a unique tracking mechanism. However, consider that if we own 32 external domains we can now control over 2.6 billion unique tracking IDs using this method. Note that the tracking ID in the sample code is rendered as Base-36 for legibility.

Why use the HSTS database as a storage mechanism

Cookies can be removed, edited, and faked. Leveraging the HSTS database as a storage mechanism potentially reduces the possibility that your tracking ID will be deleted. While this style of design is generally considered unscrupulous, the purpose of this post is to educate; whether or not this mechanism should be implemented in the wild is a matter of opinion that I leave up to the reader.

Connect with me:

RSSGitHubTwitter
LinkedInYouTubeGoogle+

Building Stateful Services with Azure Service Fabric

Fork me on GitHub
Azure Service Fabric offers two modes of operation: stateful and stateless. Both implementations allow for microservice-style application development. This tutorial focuses on building a simple, stateful microservice; that is, a microservice that maintains a degree of state between calls such that underlying objects retain their properties’ state after a client applies changes to the object.

Why Stateful

Stateful services provide the best of both worlds in terms of scalability and reliability. Azure Service Fabric encapsulates the scaling process to a great degree, by handling virtualisation and hardware-provisioning. The framework also handles load-balancing, failover, and state-synchronisation. The following is a step-by-step guide to implementing the simplest stateful service possible with Azure Service Fabric. The guide assumes that you have completed the steps involved in configuring your development environment.

1. Create a new Azure Service Fabric project

Create a new Azure Service Fabric project called “MyApplication”, selecting the Stateful Reliable Actor type from the list of available templates:

Stateful Reliable Actor Template

Stateful Reliable Actor Template

2. Add Custom Method Stubs

Locate the ISimpleActor” interface and note the existing method stubs. This interface and associated implementation is created automatically and includes two built-in method stubs. Add the following stubs so that the interface includes a “Name” property accessor and modifier:

    public interface ISimpleActor : IActor
    {
        Task<int> GetCountAsync();

        Task SetCountAsync(int count);

        Task<string> GetNameAsync();

        Task SetNameAsync(string name);
    }

Note that all method stubs are asynchronous by default. We have added two new methods; a simple name property accessor and modifier.

3. Add Name Property to State

Locate the ActorState class and modify so that the class includes a “Name” property:

        [DataContract]
        internal sealed class ActorState
        {
            [DataMember]
            public int Count { get; set; }

            [DataMember]
            public string Name { get; set; }

            public override string ToString()
            {
                return string.Format(CultureInfo.InvariantCulture, "SimpleActor.ActorState[Count = {0}]", Count);
            }
        }

4. Add Custom Methods

Add the following implementation methods to the SimpleActor class so that it satisfies the ISimpleActor interface:

        public Task<string> GetNameAsync()
        {
            return Task.FromResult(State.Name);
        }

        public Task SetNameAsync(string name)
        {
            State.Name = name;
            return Task.FromResult(true);
        }

5. Manage in Service Fabric Explorer

Deploy the application using Visual Studio:

Build -> Deploy Solution

Note that the application is now running locally in Service Fabric Explorer:

Azure Service Fabric Cluster Manager

Azure Service Fabric Cluster Manager

6. Create Proxy Client

Add a new Console Application to the solution and install the Microsoft.ServiceFabric.Services NuGet package:

Azure Service Fabric NuGet Package

Azure Service Fabric NuGet Package

Note: You may need to change the Target Framework property to 4.5.1, and also the Platform Target to X64:

Modify Target Framework

Modify Target Framework

Modify Platform Target

Modify Platform Target

Finally, include a reference to the SimpleActor.Interfaces project, and add the following to the Main method in the Program class:

            var actorId = ActorId.NewId();

            var simpleActor =
                ActorProxy.Create<ISimpleActor>(actorId, "fabric:/MyApplication");

            simpleActor.SetNameAsync("Bob");
            var name = simpleActor.GetNameAsync();

            Console.WriteLine("Hello, " + name.Result);
            Console.ReadLine();

Summary

Run the program and observe that the text “Hello, Bob” is printed to the command window. The Name property retains its state across calls. Subsequent accessor calls to the SimpleActorService will return the value “Bob”, unless that value is explicitly modified. Note that the value is synchronised across all running instances and nodes.

Connect with me:

RSSGitHubTwitter
LinkedInYouTubeGoogle+

Levaraging Azure Service Bus with C#

Fork me on GitHubAzure Service Bus
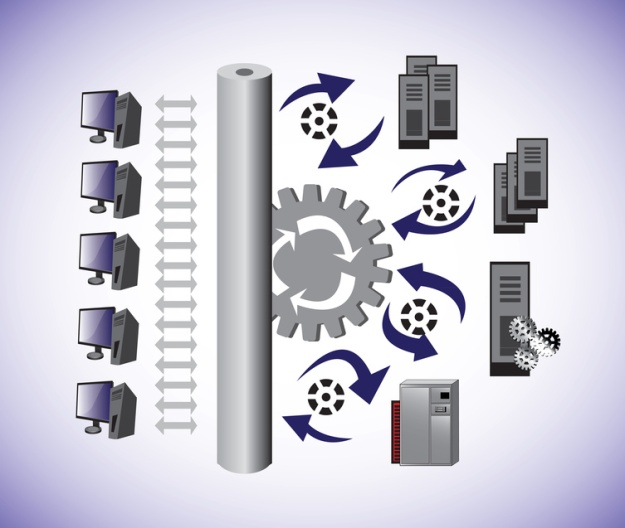
Microsoft Azure provides offers Azure Service Bus as a means of leveraging the Decoupled Middleware design pattern, among other things in your application. This post outlines a step-by-step guide to implementation, assuming that you have already established an Azure account, and have initialised an associated Service Bus.

Start with the Abstraction

This library abstracts the concept of a Service Bus to a level that is not restricted to MS Azure alone. Both ServiceBus and ServiceBusAdapter classes offer any Service Bus implementation the means to establish associated implementations in this library. Having said that, this library explicitly implements concrete classes that are specific to MS Azure Service Bus.

The MS Azure Service Bus

The MSAzureServiceBus class provides a succinct means of interfacing with an MS Azure Service Bus, consuming messages as they arrive. Upon initialisation, MSAzureServiceBus requires that a delegate be established that determines appropriate behaviour to invoke in the event of inbound new messages. Very simply, this functionality is exposed as follows:

Incoming Message-handling

public override event EventHandler<MessageReceivedEventArgs<BrokeredMessage>> MessageReceived;

private void OnMessageReceived(MessageReceivedEventArgs<BrokeredMessage> e) {
    var handler = MessageReceived;
    if (handler != null) handler(this, e);
}

Duplicate Message-handling

Similarly, behaviour applying to duplicate messages, that is, messages that have already been processed by MSAzureServiceBus, can also be established:

public override event EventHandler<MessageReceivedEventArgs<BrokeredMessage>> DuplicateMessageReceived;

private void OnDuplicateMessageReceived(MessageReceivedEventArgs<BrokeredMessage> e) {
    var handler = DuplicateMessageReceived;
    if (handler != null) handler(this, e);
}

Receiving Messages Explicitly

Bootstrapping delegates aside, MSAzureServiceBus provides a method designed to retrieve the next available message from the MS Service Bus. This method may be invoked on demand, or as part of a continuous loop, polling the MS Service Bus and consuming new messages immediately after they become available.

        protected override void ReceiveNextMessage(string publisherName, TimeSpan timeout, bool autoAcknowledge) {
            var message = serviceBusAdapter.ReceiveNextMessage(publisherName, timeout, autoAcknowledge);
            if (message == null) return;

            var isValidMessage = messageValidator.ValidateMessageId(message.MessageId);

            if (isValidMessage) {
                messageValidator.AddMessageIdToCache(message.MessageId);
                OnMessageReceived(new BrokeredMessageReceivedEventArgs(message));
            }
            else {
                OnMessageReceived(new BrokeredMessageReceivedEventArgs(message));
            }
        }

The MS Azure ServiceBus Adapter

The MSAzureServiceBusAdapter class is a Bridge that encapsulate the underlying mechanisms required to establish a connection to, send, and receive messages to and from MS Azure Service Bus. Let’s consider the functionality in that order:

Initialising a Connection

Firstly, we must establish a NamespaceManager based on an appropriate connection-string associated with out MS Azure Service Bus account:

            var connectionString = CloudConfigurationManager.GetSetting("Microsoft.ServiceBus.ConnectionString");
            _namespaceManager = NamespaceManager.CreateFromConnectionString(connectionString);

Now we return a reference to a desired Topic, creating the Topic if it does not already exist:

                _topic = !_namespaceManager.TopicExists(topicName) ?
                _namespaceManager.CreateTopic(topicName) : _namespaceManager.GetTopic(topicName);

Lastly, we create a Subscription to the Topic, if one does not already exist:

                if (!_namespaceManager.SubscriptionExists(_topic.Path, subscriptionName))
                _namespaceManager.CreateSubscription(_topic.Path, subscriptionName);

The Complete Listing

        public override void Initialise(string topicName) {
            var connectionString = CloudConfigurationManager.GetSetting("Microsoft.ServiceBus.ConnectionString");
            _namespaceManager = NamespaceManager.CreateFromConnectionString(connectionString);

            _topic = !_namespaceManager.TopicExists(topicName) ?
                _namespaceManager.CreateTopic(topicName) : _namespaceManager.GetTopic(topicName);

            if (!_namespaceManager.SubscriptionExists(_topic.Path, subscriptionName))
                _namespaceManager.CreateSubscription(_topic.Path, subscriptionName);

            _isInitialised = true;
        }

It’s worth noting that all methods pertaining to MSAzureServiceBusAdapter will implicitly invoke the Initialise method if a connection to MS Azure Service Bus has not already been established.

Sending Messages

This library offers the means to send messages in the form of BrokeredMessage objects to MS Azure Service Bus. Firstly, we must establish a connection, if one does not already exist:

if (!_isInitialised) Initialise(topicName);

Finally, initialise a SubscriptionClient, if one has not already been established, and simply send the message as-is, in BrokeredMessage-format:

            if (_topicClient == null)
                _topicClient = TopicClient.Create(topicName);
            _topicClient.Send(message);

The Complete Listing

        public override void SendMessage(string topicName, BrokeredMessage message) {
            if (!_isInitialised) Initialise(topicName);

            if (_topicClient == null)
                _topicClient = TopicClient.Create(topicName);
            _topicClient.Send(message);
        }

Receiving Messages

Receiving Messages
Messages are consumed from MS Azure Service Bus in a serial manner, one after the other. Once again, we must initially establish a connection, if one does not already exist:

            if (!_isInitialised)
                Initialise(topicName);

Next, we initialise a SubscriptionClient, if one has not already been established, and define a BrokeredMessage instance, the desired method return-type:

            if (_subscriptionClient == null)
                _subscriptionClient = SubscriptionClient.Create(topicName, subscriptionName);

            BrokeredMessage message = null;

Next, we return the next available message, or null, if there are no available messages:

                message = _subscriptionClient.Receive(timeout);
                if (message == null)
                    return null;

Note that this method defines an “autoAcknowledge” parameter. If true, we must explicitly acknowledge the consumption of the message:

                if (!autoAcknowledge) return message;
                message.Complete();

Finally, we return or abandon the message, depending on whether or not an Exception occurred:

            catch (Exception) {
                if (message != null) message.Abandon();
                throw;
            }
            return message;

The Complete Listing

        public override BrokeredMessage ReceiveNextMessage(string topicName, TimeSpan timeout, bool autoAcknowledge = false) {
            if (!_isInitialised)
                Initialise(topicName);

            if (_subscriptionClient == null)
                _subscriptionClient = SubscriptionClient.Create(topicName, subscriptionName);

            BrokeredMessage message = null;

            try {
                message = _subscriptionClient.Receive(timeout);
                if (message == null)
                    return null;
                if (!autoAcknowledge) return message;
                message.Complete();
            }
            catch (Exception) {
                if (message != null) message.Abandon();
                throw;
            }
            return message;
        }

A Practical Example

Let’s build a small Console Application to demonstrate the concept. Our application will interface with MS Azure Service Bus and continuously poll for messages until the application terminates:

            var serviceBus = new MSAzureServiceBus(new MSAzureServiceBusAdapter(), new MessageValidator());
            serviceBus.MessageReceived += serviceBus_MessageReceived;

            private static void serviceBus_MessageReceived(object sender, MessageReceivedEventArgs<BrokeredMessage> e) {
                Console.WriteLine(e.Message.MessageId);
            }

Message Validation

Notice the MessageValidator instance in the above code snippet. Let’s pause for a moment and consider the mechanics.

Messages contain message identifiers in GUID format. Our application retains an index that maps these identities. Incoming messages are validated by comparing the incoming message ID to those IDs stored within the index. If a match is found, the message is determined to be a duplicate, and appropriate action can be taken.

Here we can see that our inbound message IDs are stored in a simple HashSet of type String. Incidentally, we leverage a HashSet here to achieve what is known as constant complexity in terms of time. Essentially, the time taken to perform a lookup will remain constant (external factors such as garbage collection aside) regardless of HashSet size:

private readonly HashSet<string> _cache = new HashSet<string>();

public IEnumerable<string> Cache { get { return _cache; } }

Newly added messages are formatted to remove all hyphens, if any exist, so that the same standard is applied to message IDs, regardless of format:

        public void AddMessageIdToCache(string messageId) {
            _cache.Add(messageId.Replace('-', '\0'));
        }

        public bool ValidateMessageId(string messageId) {
            return _cache.Contains(messageId);
        }

Once initialised, the application will continuously poll MS Azure Service Bus until the return key is pressed:

            serviceBus.StartListening("TestTopic", new TimeSpan(0, 0, 1), true);
            Console.WriteLine("Listening to the Service Bus. Press any key to quit...");

            Console.ReadLine();
            serviceBus.StopListening();

            Console.WriteLine("Disconnecting...");

The Complete Listing

    internal class Program {
        private static void Main(string[] args) {
            var serviceBus = new MSAzureServiceBus(new MSAzureServiceBusAdapter(), new MessageValidator());
            serviceBus.MessageReceived += serviceBus_MessageReceived;

            serviceBus.StartListening("TestTopic", new TimeSpan(0, 0, 1), true);
            Console.WriteLine("Listening to the Service Bus. Press any key to quit...");

            Console.ReadLine();
            serviceBus.StopListening();

            Console.WriteLine("Disconnecting...");
        }

        private static void serviceBus_MessageReceived(object sender, MessageReceivedEventArgs<BrokeredMessage> e) {
            Console.WriteLine(e.Message.MessageId);
        }
    }

Simply add a new message to your MS Azure Service Bus instance. The application will consume the message and display the message ID on-screen.

Connect with me:

RSSGitHubTwitter
LinkedInYouTubeGoogle+

PayPal Express Checkout with PaySharp.NET

Fork me on GitHubPaySharp.NET
Express Checkout is the optimal solution for Enterprise Merchants to leverage PayPal, whose APIs are broad and intricate. This post aims to simplify the design and implementation of Express Checkout using a custom .NET library called PaySharp.NET.

Express Checkout is primarily composed of the following PayPal processes:

  1. SetExpressCheckout
  2. GetExpressCheckoutDetails
  3. DoExpressCheckoutPayment

The process flow is as follows:

PayPal Express Checkout in action

PayPal Express Checkout in action

Prerequisites

  • .NET Framework 4.5 or above

Installation

PM> Install-Package Daishi.PaySharp

Getting Started with PayPal Express Checkout

Register a Business Account with PayPal. PaySharp.NET requires the following prerequisite PayPal metadata:

  • Username
  • Password
  • Signature
  • ExpressCheckoutURI

ExpressCheckoutURI should refer to the PayPal Sandbox for all non-production environments. Each PayPal account is also associated with a Secure Merchant ID, which can be included in the Subjectfield (see code samples below), if for example, your application supports multiple currencies. This is an optional field, and is not prerequisite to fulfilling an Express Checkout transaction.

Explanation of Terms

SetExpressCheckout

Establishes a PayPal session based on Merchant credentials, and returns an Access Token pertaining to that session.

GetExpresscheckoutDetails

Returns a definitive collection of metadata that describes the PayPal user (nameaddress, etc.).

DoExpressCheckoutPayment

Collects the payment by transferring the transaction amount from the User’s account to the Merchant account.

Running the Test Harness

PaySharp.NET is covered by a range of Unit Tests, included with each build. To provide a greater degree of reliability, the SDK contains a Test Harness project. This project will execute a full Express Checkout transaction when invoked as follows:

  1. Locate App.config in Daishi.PaySharp.TestHarness
  2. Enter appropriate values for UserPasswordSignature, and Subject (if applicable)
  3. Run the project (F5)
  4. Press any key when prompted
  5. SetExpressCheckout executes and returns a PayPal Access TokenPaySharp Test Harness Step 1
  1. Open your web browser and navigate to https://www.sandbox.paypal.com/cgi-bin/webscr?cmd=_express-checkout&token=EC-1UR71602HJ0009422. Note that the token parameter is set to the value previously returned in Step 5
  2. Login to PayPal
  3. Your browser will redirect to http://www.example.com/success.html?token=EC-1UR71602HJ0009422&PayerID=783CTW8EXK5AE. Note the PayerID parameter
  4. Return to the Test Harness Command Prompt having copied the PayerID parameter from Step 3
  5. Press any key when prompted, and input the PayerID parameter from Step 3
  6. GetExpressCheckoutDetails is invokedPaySharp Test Harness Step 2
  1. Press any key when prompted
  2. DoExpressCheckoutPayment is invoked, successfully completing the transactionPaySharp Test Harness Step 3

Sample Code

SetExpressCheckout

                var user = ConfigurationManager.AppSettings["User"];
                var password = ConfigurationManager.AppSettings["Password"];
                var signature = ConfigurationManager.AppSettings["Signature"];
                var subject = ConfigurationManager.AppSettings["Subject"];

                var payPalAdapter = new PayPalAdapter();

                var setExpresscheckout =
                    payPalAdapter.SetExpressCheckout(
                        new SetExpressCheckoutPayload {
                            User = user,
                            Password = password,
                            Signature = signature,
                            Version = "108.0",
                            Amount = "19.95",
                            Subject = subject,
                            LocaleCode = "en-IE",
                            CurrencyCode = "EUR",
                            CancelUrl = "http://www.example.com/cancel.html",
                            ReturnUrl = "http://www.example.com/success.html",
                            PaymentRequestName = "TEST",
                            PaymentRequestDescription = "TEST BOOKING"
                        },
                        Encoding.UTF8,
                        ConfigurationManager.AppSettings["ExpressCheckoutURI"]);

                string accessToken;
                PayPalError payPalError;

                var ok = PayPalUtility.TryParseAccessToken(setExpresscheckout,
                    out accessToken, out payPalError);

GetExpressCheckoutDetails

                var getExpressCheckoutDetails = payPalAdapter
                    .GetExpressCheckoutDetails(
                        new GetExpressCheckoutDetailsPayload {
                            User = user,
                            Password = password,
                            Signature = signature,
                            Version = "108.0",
                            AccessToken = accessToken,
                            Subject = subject,
                            PayerID = payerID
                        },
                        ConfigurationManager.AppSettings["ExpressCheckoutURI"]);

                CustomerDetails customerDetails;

                ok = PayPalUtility.TryParseCustomerDetails(
                    getExpressCheckoutDetails, out customerDetails,
                    out payPalError);

DoExpressCheckoutPayment

                var doExpressCheckoutPayment = payPalAdapter
                    .DoExpressCheckoutPayment(
                        new DoExpressCheckoutPaymentPayload {
                            User = user,
                            Password = password,
                            Signature = signature,
                            Version = "108.0",
                            AccessToken = accessToken,
                            Subject = subject,
                            PayerID = payerID,
                            PaymentRequestAmt = "19.95",
                            PaymentRequestCurrencyCode = "EUR"
                        },
                        ConfigurationManager.AppSettings["ExpressCheckoutURI"]);

                TransactionResults transactionResults;

                ok = PayPalUtility.TryParseTransactionResults(
                    doExpressCheckoutPayment, out transactionResults,
                    out payPalError);

API Documentation

The API is fully documented; a *.chm Help-file is included with every build. If you prefer to view the API documentation in a web-based format, such as HTML, you can run the Sandcastle tool against any branch in order to generate the requisite files.

NoteYou will likely need to unblock the Help-file as part of Windows security measures.

FAQ

Does this library support C# Async?

Yes, there are asynchronous equivalents of each synchronous method exposed by the SDK.

I get weird errors from PayPal

Generally, PayPal issues intuitive error messages. Less intuitive error messages are usually returned as a result of uninitialized payload properties. In the case of SetExpressCheckout, scan through the properties in SetExpressCheckoutPayload and ensure that each property is set to an appropriate value.

Can I Fork this project?

By all means. I’m happy to contribute to any extensions.

What’s next?

An set of extensible components that make it easier for developers to create and augment objects proprietary to downstream systems, such as Fraud Prevention, Booking & Reservation, and Back-office Accounting systems.

Connect with me:

RSSGitHubTwitter
LinkedInYouTubeGoogle+

Microservices in C# Part 5: Autoscaling

Fork me on GitHub

Balancing demand and processing power

Balancing demand and processing power

Autoscaling Microservices

In the previous tutorial, we demonstrated the throughput increase by invoking multiple instances of SimpleMathMicroservice, in order to facilitate a greater number of concurrent inbound HTTP requests. We experimented with various configurations, increasing the count of simultaneously running instances of SimpleMathMicroservice until the law of diminishing returns set it.

This is a perfectly adequate configuration for applications that absorb a consistent number of inbound HTTP requests over any given extended period of time. Most web applications, of course, do not adhere to this model. Instead, traffic tends to fluctuate, depending on several factors, not least of which is the type of business that the web application facilitates.

This presents a significant problem, in that we cannot manually throttle the number of concurrently running Microservice instances on-demand, as traffic dictates. We need an automated mechanism to scale our Microservice instances adequately.

Autoscaling involves more than simply increasing the count of running instances during heavy load. It also involves the graceful termination of superfluous instances, or instances that are no longer necessary to meet the demands of the application as load is reduced. Daishi.AMQP provides just such features, which we’ll cover in detail.

QueueWatch

QueueWatch is a mechanism that allows the monitoring of RabbitMQ Queues in real time. It achieves this by polling the RabbitMQ Management API (mentioned in Part #3) at regular intervals, returning metadata that describes the current state of each Queue.

Metadata

RabbitMQ exposes important metadata pertaining to each Queue. This metadata is presented in a user-friendly manner in the RabbitMQ Management Console:

Message Rates

Message Rates

These metrics represent the rates at which messages are processed by RabbitMQ. “Publish” illustrates the rate at which messages are introduced to the server, while “Deliver” represents the rate at which messages are dispatched to listening consumers (Microservices, in our case).

This information is readily available in the RabbitMQ Management API. QueueWatch effectively harvests this information, comparing the values retrieved in the latest poll with those retrieved in the previous, to monitor the flow of messages through RabbitMQ. QueueWatch can determine whether or not any given Queue is idling, overworked, or somewhere in between.

Once a Queue is determined to be under heavy load, QueueWatch triggers an event, and dispatches an AutoScale message to the Microservice consuming the heavily-laden Queue. The Microservice can then instantiate more AMQPConsumer instances in order to drain the Queue sufficiently.

Just Show Me the Code

Create a new Microservice instance called QueueWatchMicroservice; an implementation of Microservice, and add the following code to the Init method:

            var amqpQueueMetricsManager = new RabbitMQQueueMetricsManager(false, "localhost", 15672, "paul", "password");

            AMQPQueueMetricsAnalyser amqpQueueMetricsAnalyser = new RabbitMQQueueMetricsAnalyser(
                new ConsumerUtilisationTooLowAMQPQueueMetricAnalyser(
                    new ConsumptionRateIncreasedAMQPQueueMetricAnalyser(
                        new DispatchRateDecreasedAMQPQueueMetricAnalyser(
                            new QueueLengthIncreasedAMQPQueueMetricAnalyser(
                                new ConsumptionRateDecreasedAMQPQueueMetricAnalyser(
                                    new StableAMQPQueueMetricAnalyser()))))), 20);

            AMQPConsumerNotifier amqpConsumerNotifier = new RabbitMQConsumerNotifier(RabbitMQAdapter.Instance, "monitor");
            RabbitMQAdapter.Instance.Init("localhost", 5672, "paul", "password", 50);

            _queueWatch = new QueueWatch(amqpQueueMetricsManager, amqpQueueMetricsAnalyser, amqpConsumerNotifier, 5000);
            _queueWatch.AMQPQueueMetricsAnalysed += QueueWatchOnAMQPQueueMetricsAnalysed;

            _queueWatch.StartAsync();

There’s a lot to talk about here. Firstly, remember that the primary function of QueueWatch is to poll the RabbitMQ Management API. In doing so, QueueWatch returns several metrics pertaining to each Queue. We need to decide which metrics we are interested in.

Metrics are represented by implementations of AMQPQueueMetricAnalyser, and chained together as per the Chain of Responsibility Design Pattern. Each link in the chain is executed until a predefined performance condition is met. For example, let’s consider the ConsumerUtilisationTooLowAMQPQueueMetricAnalyser. This implementation of AMQPQueueMetricAnalyser inspects the ConsumerUtilisation metric, and determines whether the value is less than 99%, in which case, there are not enough consuming Microservices to adequately drain the Queue. At this point, a ConsumerUtilisationTooLow value is returned, the chain of execution ends, and QueueWatch issues an AutoScale directive:

        public override void Analyse(AMQPQueueMetric current, AMQPQueueMetric previous, ConcurrentBag<AMQPQueueMetric> busyQueues, ConcurrentBag<AMQPQueueMetric> quietQueues, int percentageDifference) {
            if (current.ConsumerUtilisation >= 0 && current.ConsumerUtilisation < 99) {
                current.AMQPQueueMetricAnalysisResult = AMQPQueueMetricAnalysisResult.ConsumerUtilisationTooLow;
                busyQueues.Add(current);
            }
            else analyser.Analyse(current, previous, busyQueues, quietQueues, percentageDifference);
        }

Scale-Out Directive

Scaling out

Scaling out

QueueWatch must issue Scale-Out directives through dedicated Queues in order to adhere to the Decoupled Middleware design. QueueWatch should not know anything about the downstream Microservices, and should instead communicate through AMQP, specifically, through a dedicated Exchange.

Each Microservice must now listen to 2 Queues. E.g., SimpleMathMicroservice will continue listening to the Math Queue, as well as a Queue called AutoScale, for the purpose of demonstration. SimpleMathMicroservice will receive Scale-Out directives through this Queue. We should modify SimpleMathMicroservice accordingly:

        public void Init() {
            _adapter = RabbitMQAdapter.Instance;
            _adapter.Init("localhost", 5672, "guest", "guest", 50);

            _rabbitMQConsumerCatchAll = new RabbitMQConsumerCatchAll("Math", 10);
            _rabbitMQConsumerCatchAll.MessageReceived += OnMessageReceived;

            _autoScaleConsumerCatchAll = new RabbitMQConsumerCatchAll("AutoScale", 10);
            _autoScaleConsumerCatchAll.MessageReceived += _autoScaleConsumerCatchAll_MessageReceived;

            _consumers.Add(_rabbitMQConsumerCatchAll);

            _adapter.Connect();
            _adapter.ConsumeAsync(_autoScaleConsumerCatchAll);
            _adapter.ConsumeAsync(_rabbitMQConsumerCatchAll);
        }

Create a Topic Exchange called “monitor”. QueueWatch will publish to this Exchange, which will route the message to an appropriate Queue. Now create a binding between the monitor Exchange and the AutoScale Queue:

Exchange Binding

Exchange Binding

Note that the Routing Key is the name of the Queue under monitor. If QueueWatch determines that the Math Queue is under load, then it will issue a Scale-Out directive to the monitor Exchange, with a Routing Key of “Math”. The monitor Exchange will react by routing the Scale-Out directive to the AutoScale Queue, to which an explicit binding exists. SimpleMathMicroservice consumes the Scale-Out directive and reacts appropriately, by instantiating a new AMQPConsumer:

            if (e.Message.Contains("scale-out")) {
                var consumer = new RabbitMQConsumerCatchAll("Math", 10);
                _adapter.ConsumeAsync(consumer);
                _consumers.Add(consumer);
            }
            else {
                if (_consumers.Count <= 1) return;
                var lastConsumer = _consumers[_consumers.Count - 1];

                _adapter.StopConsumingAsync(lastConsumer);
                _consumers.RemoveAt(_consumers.Count - 1);
            }

Summary

QueueWatch provides a means of returning key RabbitMQ Queue metrics at regular intervals, in order to determine whether demand, in terms of the number of running Microservice instances, is waxing or waning. QueueWatch also provides a means of reacting to such events, by publishing AutoScale notifications to downstream Microservices, so that they can scale accordingly, providing sufficient processing power at any given instant. The process is simplified as follows:

  1. QueueWatch returns metrics describing each Queue
  2. Queue metrics are compared against the last batch returned by QueueWatch
  3. AutoScale messages are dispatched to a Monitor Exchange
  4. AutoScale messages are routed to the appropriate Queue
  5. AutoScale messages are consumed by the intended Microservices
  6. Microservices scale appropriately, based on the AutoScale message

Next Steps

  • Prevent a “bounce” effect as traffic arbitrarily fluctuates for reasons not pertaining to application usage, such as network slow-down, or hardware failure
  • The current implementation compares metrics in a very simple fashion. Future implementations will instead graph metric metadata, and react to more thoroughly defined thresholds

Connect with me:

RSSGitHubTwitter
LinkedInYouTubeGoogle+

Microservices in C# Part 4: Scaling Out

Fork me on GitHub

Scaling Out

Scaling out our Microservices

So far, we have

  • established a simple Microservice
  • abstracted and sufficiently covered the Microservice core logic in terms of tests
  • created a reusable Microservice template
  • implemented the queue-pooling concept to ensure reliable message delivery
  • run simple load tests to adequately size Queue resources

Now it’s time to scale out. Here’s how our design currently looks:

Our current design

Our current design

This design is fine for demonstration purposes, but requires augmentation to facilitate production release. Consider that the current design will only service a single request at any given time, and will service requests in a FIFO manner, assuming that no hardware failure, or otherwise, occurs.

Even under ideal conditions, assuming that each request takes exactly 1 second to complete, given 100 inbound HTTP requests, the 1st request will complete in 1 second. The final, 100th request, will complete in 100 seconds.

Clearly, this is less than ideal. Intuitively, we might consider optimising the processing speed of our Microservice. Certainly this will help, but does little to solve the problem. Let’s say that our engineers work tirelessly to cut response times in half:

Working tirelessly to shatter response-times!

Working tirelessly to shatter response-times!

Even if they achieve this, in a batch of 100 requests, the 100th request will still take 50 seconds to complete. Instead, let’s focus on serving multiple requests in a concurrent, and potentially parallel manner. Our augmented design will be as follows:

Augmented design

Augmented design

Notice that instead of a single instance of SimpleMathMicroservice, there are now multiple instances running. How many instances do we need? That depends on 2 factors – response times and something called Quality-of-Service (QOS).

Quality of Service

Quality of Service is a feature of AMQP that defines the level of service exhibited by AMQP Channels at any given time. QOS is expressed as a percentage; 100% suggests that any given channel is utilised to maximum effect. Essentially, we need to avoid downtime in terms of channel-usage. Downtime can be described as the period of time that a Microservice is idle, or not doing work.

Typically, such scenarios occur when a Microservice is waiting on messages in transit, or is itself transmitting message-receipt acknowledgements to the Message Bus. For more information on QOS, please refer to this post. For the moment, we’re going to begin with the most intuitive design possible, without delving deeply into the complexities of QOS, and related concepts such as prefetch-count.

To that end, we are going to deploy multiple instances of our SimpleMathMicroservice (10, to be exact), and retain the default message-delivery mechanism – to read each message from a Queue one-at-a-time. In order to achieve this, we must modify our application slightly, specifically, the Global.asax.cs file. First, add a simple collection to house multiple running SimpleMathMicroservice instances:

private readonly List<SimpleMathMicroservice> _simpleMathMicroservices = new List<SimpleMathMicroservice>();

Now, instantiate 10 unique instances of SimpleMathMicroservice, initialise each instance, and add it to the collection:

            for (var i = 0; i < 10; i++) {
                var simpleMathMicroservice = new SimpleMathMicroservice();
                _simpleMathMicroservices.Add(simpleMathMicroservice);

                simpleMathMicroservice.Init();
            }

Finally, modify the Application_End function such that it gracefully shuts down each SimpleMathMicroservice instance:

            foreach (var simpleMathMicroservice in _simpleMathMicroservices) {
                simpleMathMicroservice.Shutdown();
            }

Now, on startup, 10 instances of SimpleMathMicroservice will be invoked, and will each actively listen to the Math Queue.

Message Distribution

SimpleMathMicroservice leverages a component called AMQPConsumer within the Daishi.AMQP library that defines the manner in which SimpleMathMicroservice will read messages from any given Queue. AMQPConsumer exposes a constructor that accepts a value called prefetchCount:

        protected AMQPConsumer(string queueName, int timeout, ushort prefetchCount = 1, bool noAck = false,
            bool createQueue = true, bool implicitAck = true, IDictionary<string, object> queueArgs = null) {
            this.queueName = queueName;
            this.prefetchCount = prefetchCount;
            this.noAck = noAck;
            this.createQueue = createQueue;
            this.timeout = timeout;
            this.implicitAck = implicitAck;
            this.queueArgs = queueArgs;
        }

Notice the default prefetchCount value of 1. This default setting results behaviour that allows the component to read messages one-at-a-time. It also ensures that RabbitMQ will distribute messages evenly, in a round-robin manner, among consumers. Now our application is configured to process multiple requests in a concurrent manner.

Concurrency and Parallelism

Can our application now be described a parallel? That depends. Concurrency is essentially the act of performing multiple tasks on a single CPU, or core. Parallelism on the other hand, can be described as the act of performing multiple tasks, or multiple stages of a single task, across multiple cores.

By this definition, or application certainly operates in a concurrent manner. But does it also operate in a parallel manner? That depends. Running the application on a single core machine obviously prohibits parallelism. Running on multiple cores will very likely result in parallel processing. Under the hood, the Daishi.AMQP library invokes a new thread for each Microservice operation that consumes messages from a Queue:

        public void ConsumeAsync(AMQPConsumer consumer) {
            if (!IsConnected) Connect();

            var thread = new Thread(o => consumer.Start(this));
            thread.Start();

            while (!thread.IsAlive)
                Thread.Sleep(1);
        }

“Wait, you shouldn’t invoke threads manually! That’s what ThreadPool.QueueUserWorkItem() is for!”

ThreadPool.QueueUserWorkItem() invokes threads as background operations. We require foreground threads, to ensure that the OS provides enough resources to run sufficiently, and also to prevent the OS from pre-empting the thread altogether, in cases when heavy load reduces resource availability.

Assuming that batches of newly created threads run (or are context-switched) across multiple cores, one could argue that our application exhibits parallel processing behaviour.

Run an ApacheBench load test against the running application:

ab -n 10000 -c 10 http://localhost:46653/api/math/1500

While the test is running, refer to the Math Queue in the RabbitMQ Administrator interface:

http://localhost:15672/#/queues/%2F/Math

Notice the number of Consumers (10) and the Consumer Utilisation figure. This figure represents the QOS value associated with the Queue. It should settle at the 100% mark for the duration of the test, indicating that each of all 10 SimpleMathMicroservice instances are constantly busy, and not idle:

Quality of Service

Quality of Service

Next Steps

Modify the number of running SimpleMathMicroservice instances, and apply load tests to each setting. Ideally, push the number of running instances upwards in reasonable increments (batches of 5-10) and observe the response times, comparing each run against the last.

Response times should improve incrementally, then plateau, and ultimately decrease as you increase the number of running instances. This is an indication that your application has reach critical mass, based on the law of diminishing returns. Doing this will yield the number of SimpleMathMicroservice instances that you should deploy in order to achieve optimal throughput.

Connect with me:

RSSGitHubTwitter
LinkedInYouTubeGoogle+

Microservices in C# Part 3: Queue Pool Sizing

Fork me on GitHub

Fine tuning QueuePool

Fine tuning QueuePool

This tutorial expands on the previous tutorial, focusing on the Queue Pool concept. By way of quick refresher, a Queue Pool is a feature of the Daishi.AMQP library that allows AMQP Queues to be shared among clients in a concurrent capacity, such that each Queue will have 0…1 consumers only. The concept is not unlike database connection-pooling.

We’ve built a small application that leverages a simple downstream Microservice, implements the AMQP protocol over RabbitMQ, and operates a QueuePool mechanism. We have seen how the QueuePool can retrieve the next available Queue:

var queue = QueuePool.Instance.Get();

And how Queues can be returned to the QueuePool:

QueuePool.Instance.Put(queue);

We have also considered the QueuePool default Constructor, how it leverages the RabbitMQ Management API to return a list of relevant Queues:

        private QueuePool(Func&amp;lt;AMQPQueue&amp;gt; amqpQueueGenerator) {
            _amqpQueueGenerator = amqpQueueGenerator;
            _amqpQueues = new ConcurrentBag&amp;lt;AMQPQueue&amp;gt;();

            var manager = new RabbitMQQueueMetricsManager(false, &amp;quot;localhost&amp;quot;, 15672, &amp;quot;paul&amp;quot;, &amp;quot;password&amp;quot;);
            var queueMetrics = manager.GetAMQPQueueMetrics();

            foreach (var queueMetric in queueMetrics.Values) {
                Guid queueName;
                var isGuid = Guid.TryParse(queueMetric.QueueName, out queueName);

                if (isGuid) {
                    _amqpQueues.Add(new RabbitMQQueue {IsNew = false, Name = queueName.ToString()});
                }
            }
        }

Notice the high-order function in the above constructor. In the QueuePool static Constructor we define this function as follows:

        private static readonly QueuePool _instance = new QueuePool(
            () =&amp;gt; new RabbitMQQueue {
                Name = Guid.NewGuid().ToString(),
                IsNew = true
            });

This function will be invoked if the QueuePool is exhausted, and there are no available Queues. It is a simple function that creates a new RabbitMQQueue object. The Daishi.AMQP library will ensure that this Queue is created (if it does not already exist) when referenced.

Exhaustion is Expensive

QueuePool exhaustion is something that we need to avoid. If our application frequently consumes all available Queues then the QueuePool will become ineffective. Let’s look at how we go about avoiding this scenario.

First, we need some targets. We need to know how much traffic our application will absorb in order to adequately size our resources. For argument’s sake, let’s assume that our MathController will be subjected to 100,000 inbound HTTP requests, delivered in batches of 10. In other words, at any given time, MathController will service 10 simultaneous requests, and will continue doing so until 100,000 requests have been served.

Stress Testing Using Apache Bench

Apache Bench is a very simple, lightweight tool designed to test web-based applications, and is bundled as part of the Apache Framework. Click here for simple download instructions. Assuming that our application runs on port 46653, here is the appropriate Apache Bench command to invoke 100 MathController HTTP requests in batches of 10:

-ab -n 100 -c 10 http://localhost:46653/api/math/150

Notice the “n” and “c” paramters; “n” refers to “number”, as in the number of requests, and “c” refers to “concurrency”, or the amount of requests to run in simultanously. Running this command will yield something along the lines of the following:

Benchmarking localhost (be patient).....done

Server Software: Microsoft-IIS/10.0
Server Hostname: localhost
Server Port: 46653

Document Path: /api/math/150
Document Length: 5 bytes

Concurrency Level: 10
Time taken for tests: 7.537 seconds
Complete requests: 100
Failed requests: 0
Total transferred: 39500 bytes
HTML transferred: 500 bytes
Requests per second: 13.27 [#/sec] (mean)
Time per request: 753.675 [ms] (mean)
Time per request: 75.368 [ms] (mean, across all concurrent requests)
Transfer rate: 5.12 [Kbytes/sec] received

Connection Times (ms)
min mean[+/-sd] median max
Connect: 0 0 0.4 0 1
Processing: 41 751 992.5 67 3063
Waiting: 41 751 992.5 67 3063
Total: 42 752 992.4 67 3063

Percentage of the requests served within a certain time (ms)
50% 67
66% 1024
75% 1091
80% 1992
90% 2140
95% 3058
98% 3061
99% 3063
100% 3063 (longest request)

Adjusting QueuePool for Optimal Results

Adjusting QueuePool
Those results don’t look great. Incidentally, if you would like more information as regards how to interpret Apache Bench results, click here. Let’s focus on the final section, “Percentage of the requests served within a certain time (ms)”. Here we see that 75% of all requests took just over 1 second (1091 ms) to complete. 10% took over 2 seconds, and 5% took over 3 seconds to complete. That’s quite a long time for such a simple operation running on a local server. Let’s run the same command again:

Benchmarking localhost (be patient).....done

Server Software: Microsoft-IIS/10.0
Server Hostname: localhost
Server Port: 46653

Document Path: /api/math/100
Document Length: 5 bytes

Concurrency Level: 10
Time taken for tests: 0.562 seconds
Complete requests: 100
Failed requests: 0
Total transferred: 39500 bytes
HTML transferred: 500 bytes
Requests per second: 177.94 [#/sec] (mean)
Time per request: 56.200 [ms] (mean)
Time per request: 5.620 [ms] (mean, across all concurrent requests)
Transfer rate: 68.64 [Kbytes/sec] received

Connection Times (ms)
min mean[+/-sd] median max
Connect: 0 0 0.4 0 1
Processing: 29 54 11.9 49 101
Waiting: 29 53 11.9 49 101
Total: 29 54 11.9 49 101

Percentage of the requests served within a certain time (ms)
50% 49
66% 54
75% 57
80% 60
90% 73
95% 80
98% 94
99% 101
100% 101 (longest request)

OK. Those results look a lot better. Even the longest request took 101 ms, and 80% of all requests completed in <= 60 ms.

But where does this discrepancy come from? Remember, that on start-up there are no QueuePool Queues. The QueuePool is empty and does not have any resources to distribute. Therefore, inbound requests force QueuePool to create a new Queue in order to facilitate the request, and then reclaim that Queue when the request has completed.

Does this mean that when I deploy my application, the first batch of requests are going to run much more slowly than subsequent requests?

No, that’s where sizing comes in. As with all performance testing, the objective is to set a benchmark in terms of the expected volume that an application will absorb, and to determine that maximum impact that it can withstand, in terms of traffic. In order to sufficiently bootstrap QueuePool, so that it contains an adequate number of dispensable Queues, we can simply include ASP.NET controllers that leverage QueuePool in our performance run.

Suppose that we expect to handle 100 concurrent users over extended periods of time. Let’s run an Apache Bench command again, setting the level of concurrency to 100, with a suitably high number of requests in order to sustain that volume over a reasonably long period of time:

ab -n 1000 -c 100 http://localhost:46653/api/math/100


Percentage of the requests served within a certain time (ms)
50% 861
66% 938
75% 9560
80% 20802
90% 32949
95% 34748
98% 39756
99% 41071
100% 42163 (longest request)

Again, very poor, but expected results. More interesting is the number of Queues now active in RabbitMQ:

New QueuePool Queues

New QueuePool Queues

In my own environment, QueuePool created 100 Queues in order to facilitate all inbound requests. Let’s run the test again, and consider the results:

Percentage of the requests served within a certain time (ms)
50% 497
66% 540
75% 575
80% 591
90% 663
95% 689
98% 767
99% 816
100% 894 (longest request)

These results are much more respectable. Again, the discrepancy between performance runs is due to the fact that QueuePool was not adequately initialised during the first run. However, QueuePool was initialised with 100 Queues, a volume sufficient to facilitate the volume of request that the application is expected to serve. This is simple an example as possible.

Real world performance testing entails a lot more than simply executing isolated commands against single endpoints, however the principal remains the same. We have effectively determined the optimal size necessary for QueuePool to operate efficiently, and can now size it accordingly on application start-up, ensuring that all inbound requests are served quickly and without bias.

Those already versed in the area of Microservices might object at this point. There is only a single instance of our Microservice, SimpleMathMicroservice, running. One of the fundamental concepts behind Microservice design is scalability. In my next article, I’ll cover scaling, and we’ll drive those performance response times into the floor.

Connect with me:

RSSGitHubTwitter
LinkedInYouTubeGoogle+

Microservices in C# Part 2: Consistent Message Delivery

Fork me on GitHub

Microservice Architecture

Microservice Architecture

Ensuring that Messages are Consumed by their Intended Recipient

This tutorial builds on the simple Microservice application that we built in the previous tutorial. Everything looks good so far, but what happens when we release this to production, and our application is consumed by multiple customers? Routing problems and message-correlation issue begin to rear their ugly heads. Our current example is simplistic. Consider a deployed application that performs work that is much more complex than our example.

Now we are faced with a problem; how to ensure that any given message is received by its intended recipient only. Consider the following process flow:

potential for mismatched message-routing

potential for mismatched message-routing

It is possible that outbound messages published from the SimpleMath Microservice may not arrive at the ASP.NET application in the same order in which the ASP.NET application initially published the corresponding request to the SimpleMath Microservice.

RabbitMQ has built-in safeguards against this scenario in the form of Correlation IDs. A Correlation ID is essentially a unique value assigned by the ASP.NET application to inbound messages, and retained throughout the entire process flow. Once processed by the SimpleMath Microservice, the Correlation ID is inserted into the associated response message, and published to the response Queue.

Upon receipt of any given message, the ASP.NET inspects the message contents, extracts the Correlation ID and compares it to the original Correlation ID. Consider the following pseudo-code:

            Message message = new Message();
            message.CorrelationID = new CorrelationID();

            RabbitMQAdapter.Instance.Publish(message.ToJson(), "MathInbound");

            string response;
            BasicDeliverEventArgs args;

            var responded = RabbitMQAdapter.Instance.TryGetNextMessage("MathOutbound", out response, out args, 5000);

            if (responded) {
                Message m = Parse(response);
                if (m.CorrelationID == message.CorrelationID) {
                    // This message is the intended response associated with the original request
                }
                else {
                    // This message is not the intended response, and is associated with a different request
                    // todo: Put this message back in the Queue so that its intended recipient may receive it...
                }
            }
            throw new HttpResponseException(HttpStatusCode.BadGateway);

What’s wrong with this solution?

It’s possible that any given message may be bounced around indefinitely, without ever reaching its intended recipient. Such a scenario is unlikely, but possible. Regardless, it is likely, given multiple Microservices, that messages will regularly be consumed by Microservices to whom the message was not intended to be delivered. This is an obvious inefficiency, and very difficult to control from a performance perspective, and impossible to predict in terms of scaling.

But this is the generally accepted solution. What else can we do?

An alternative, but discouraged solution is to invoke a dedicated Queue for each request:

dedicated queue per inbound request

dedicated queue per inbound request

Whoa! Are you suggesting that we create a new Queue for each request?!?

Yes, so let’s park that idea right there – it’s essentially a solution that won’t scale. We would place an unnecessary amount of pressure on RabbitMQ in order to fulfil this design. A new Queue for every inbound HTTP request is simply unmanageable.

Or, is it?

What if we could manage this? Imagine a dedicated pool of Queues, made available to inbound requests, such that each Queue was returned to the pool upon request completion. This might sound far-fetched, but this is essentially the way that database connection-pooling works. Here is the new flow:

consistent message routing using queue-pooling

consistent message routing using queue-pooling

Let’s walk through the code, starting with the QueuePool itself:

    public class QueuePool {
        private static readonly QueuePool _instance = new QueuePool(
            () => new RabbitMQQueue {
                Name = Guid.NewGuid().ToString(),
                IsNew = true
            });

        private readonly Func<AMQPQueue> _amqpQueueGenerator;
        private readonly ConcurrentBag<AMQPQueue> _amqpQueues;

        static QueuePool() {}

        public static QueuePool Instance { get { return _instance; } }

        private QueuePool(Func<AMQPQueue> amqpQueueGenerator) {
            _amqpQueueGenerator = amqpQueueGenerator;
            _amqpQueues = new ConcurrentBag<AMQPQueue>();

            var manager = new RabbitMQQueueMetricsManager(false, "localhost", 15672, "guest", "guest");
            var queueMetrics = manager.GetAMQPQueueMetrics();

            foreach (var queueMetric in queueMetrics.Values) {
                Guid queueName;
                var isGuid = Guid.TryParse(queueMetric.QueueName, out queueName);

                if (isGuid) {
                    _amqpQueues.Add(new RabbitMQQueue {IsNew = false, Name = queueName.ToString()});
                }
            }
        }

        public AMQPQueue Get() {
            AMQPQueue queue;

            var queueIsAvailable = _amqpQueues.TryTake(out queue);
            return queueIsAvailable ? queue : _amqpQueueGenerator();
        }

        public void Put(AMQPQueue queue) {
            _amqpQueues.Add(queue);
        }
    }

QueuePool is a static class that retains a reference to a synchronised collection of Queue objects. The most important aspect of this is that the collection is synchronised, and therefore thread-safe. Under the hood, incoming HTTP requests obtain mutually exclusive locks in order to extract a Queue from the collection. In other words, any given request that extracts a Queue is guaranteed to have exclusive access to that Queue.

Note the private constructor. Upon start-up (QueuePool will be initialised by the first inbound HTTP request) and will invoke a call to the RabbitMQ HTTP API, returning a list of all active Queues. You can mimic this call as follows:

curl -i -u guest:guest http://localhost:15672/api/queues

The list of returned Queue objects is filtered by name, such that only those Queues that are named in GUID-format are returned. QueuePool expects that all underlying Queues implement this convention in order to separate them from other Queues leveraged by the application.

Now we have a list of Queues that our QueuePool can distribute. Let’s take a look at our updated Math Controller:

            var queue = QueuePool.Instance.Get();
            RabbitMQAdapter.Instance.Publish(string.Concat(number, ",", queue.Name), "Math");

            string message;
            BasicDeliverEventArgs args;

            var responded = RabbitMQAdapter.Instance.TryGetNextMessage(queue.Name, out message, out args, 5000);
            QueuePool.Instance.Put(queue);

            if (responded) {
                return message;
            }
            throw new HttpResponseException(HttpStatusCode.BadGateway);

Let’s step through the process flow from the perspective of the ASP.NET application:

  1. Retrieves exclusive use of the next available Queue from the QueuePool
  2. Publishes the numeric input (as before) to SimpleMath Microservice, along with the Queue-name
  3. Subscribes to the Queue retrieved from QueuePool, awaiting inbound messages
  4. Receives the response from SimpleMath Microservice, which published to the Queue specified in step #2
  5. Releases the Queue, which is re-inserted into QueuePool’s underlying collection

Notice the Get method. An attempt is made to retrieve the next available Queue. If all Queues are currently in use, QueuePool will create a new Queue.

Summary

Leveraging QueuePool offers greater reliability in terms of message delivery, as well as consistent throughput speeds, given that we no longer need rely on consuming components to re-queue messages that were intended for other consumers.

It offers a degree of predictable scale – performance testing will reveal the optimal number of Queues that the QueuePool should retain in order to achieve sufficient response times.

It is advisable to determine the optimal number of Queues required by your application, so that QueuePool can avoid creating new Queues in the event of pool-exhaustion, reducing overhead.

Connect with me:

RSSGitHubTwitter
LinkedInYouTubeGoogle+

Microservices in C# Part 1: Building and Testing

Fork me on GitHub

Microservice Architecture

Microservice Architecture

Overview

I’m often asked how to design and build a Microservice framework. It’s a tricky concept, considering loose level of coupling between Microservices. Consider the following scenario outlining a simple business process that consists of 3 sub-processes, each managed by a separate Microservice:

Microservice Architecture core concept

Microservice Architecture core concept

In order to test this process, it would seem that we need a Service Bus, or at the very least, a Service Bus mock in order to link the Microservices. How else will the Microservices communicate? Without a Service Bus, each Microservice is effectively offline, and cannot communicate with any component outside its own context. Let’s examine that concept a little bit further…maybe there is a way that we can establish at least some level of testing without a Service Bus.

A Practical Example

First, let’s expand on the previous tutorial and actually implement a simple Microservice-based application. The application will have 2 primary features:

  • Take an integer-based input and double its value
  • Take a text-based input and reverse it

Both features will be exposed through Microservices. Our first task is to define the Microservice itself. At a fundamental level, Microservices consist of a simple set of functionality:

Anatomy of a Microservice

Anatomy of a Microservice

Consider each Microservice daemon in the above diagram. Essentially, each they consist of

  • a Message Dispatcher (publishes messages to a service bus
  • an Event Listener (receives messages from a service bus
  • Proprietary business logic (to handle inbound and outbound messages)

Let’s design a simple contract that encapsulates this:

    internal interface Microservice {
        void Init();
        void OnMessageReceived(object sender, MessageReceivedEventArgs e);
        void Shutdown();
    }

Each Microservice implementation should expose this functionality. Let’s start with a simple math-based Microservice:

    public class SimpleMathMicroservice : Microservice {
        private RabbitMQAdapter _adapter;
        private RabbitMQConsumerCatchAll _rabbitMQConsumerCatchAll;

        public void Init() {
            _adapter = RabbitMQAdapter.Instance;
            _adapter.Init("localhost", 5672, "guest", "guest", 50);

            _rabbitMQConsumerCatchAll = new RabbitMQConsumerCatchAll("Math", 10);
            _rabbitMQConsumerCatchAll.MessageReceived += OnMessageReceived;

            _adapter.Connect();
            _adapter.ConsumeAsync(_rabbitMQConsumerCatchAll);
        }

        public void OnMessageReceived(object sender, MessageReceivedEventArgs e) {
            var input = Convert.ToInt32(e.Message);
            var result = Functions.Double(input);

            _adapter.Publish(result.ToString(), "MathResponse");
        }

        public void Shutdown() {
            if (_adapter == null) return;

            if (_rabbitMQConsumerCatchAll != null) {
                _adapter.StopConsumingAsync(_rabbitMQConsumerCatchAll);
            }

            _adapter.Disconnect();
        }
    }

Functionality in Detail

Init()

Establishes a connection to RabbitMQ. Remember, as per the previous tutorial, we need only a single connection. This connection is a TCP pipeline designed to funnel all communications to RabbitMQ from the Microservice, and back. Notice the RabbitMQConsumerCatchAll implementation. Here we’ve decided that in the event of an exception occurring, our Microservice will catch each exception and deal with it accordingly. Alternatively, we could have implemented RabbitMQConsumerCatchOne, which would cause the Microservice to disengage from the RabbitMQ Queue that it is listening to (essentially a Circuit Breaker, which I’ll talk about in a future post). In this instance, the Microservice is listening to a Queue called “Math”, to which messages will be published from external sources.

OnMessageReceived()

Our core business logic, in this case, multiplying an integer by 2, is implemented here. Once the calculation is complete, the result is dispatched to a Queue called “MathResponse”.

Shutdown()

Gracefully closes the underlying connection to RabbitMQ.

Unit Testing

There are several moving parts here. How do we test this? Let’s extract the business logic from the Microservice. Surely testing this separately from the application will result in a degree of confidence in the inner workings of our Microservice. It’s a good place to start.
Here is the core functionality in our SimpleMathMicroservice (Functions class in Daishi.Math):

        public static int Double(int input) {
            return input * 2;
        }

Introducing a Unit Test as follows ensures that our logic behaves as designed:

    [TestFixture]
    internal class MathTests {
        [Test]
        public void InputIsDoubled() {
            const int input = 5;
            var output = Functions.Double(input);

            Assert.AreEqual(10, output);
        }
    }

Now our underlying application logic is sufficiently covered from a Unit Testing perspective. Let’s focus on the application once again.

Entrypoint

How will users leverage our application? Do they interface with the Microservice framework through a UI? No, like all web applications, we must provide an API layer, exposing a HTTP channel through which users interact with our application. Let’s create a new ASP.NET application and edit Global.asax as follows:

            # region Microservice Init
            _simpleMathMicroservice = new SimpleMathMicroservice();
            _simpleMathMicroservice.Init();

            #endregion

            #region RabbitMQAdapter Init

            RabbitMQAdapter.Instance.Init("localhost", 5672, "guest", "guest", 100);
            RabbitMQAdapter.Instance.Connect();

            #endregion

We’re going to run an instance of our SimpleMathMicroservice alongside our ASP.NET application. This is fine for the purpose of demonstration, however each Microservice should run in its own context, as a daemon (*.exe in Windows) in a production equivalent. In the above code snippet, we initialise our SimpleMathMicroservice and also establish a separate connection to RabbitMQ to allow the ASP.NET application to publish and receive messages. Essentially, our SimpleMathService instance will run silently, listening for incoming messages on the “Math” Queue. Our adjacent ASP.NET application will publish messages to the “Math” Queue, and attempt to retrieve responses from SimpleMathService by listening to the “MathResponse” Queue. Let’s implement a new ASP.NET Controller class to achieve this:

    public class MathController : ApiController {
        public string Get(int id) {
            RabbitMQAdapter.Instance.Publish(id.ToString(), "Math");

            string message;
            BasicDeliverEventArgs args;
            var responded = RabbitMQAdapter.Instance.TryGetNextMessage("MathResponse", out message, out args, 5000);

            if (responded) {
                return message;
            }
            throw new HttpResponseException(HttpStatusCode.BadGateway);
        }
    }

Navigating to http://localhost:{port}/api/math/100 will initiate the following process flow:

  • ASP.NET application publishes the integer value 100 to the “Math” Queue
  • ASP.NET application immediately polls the “MathResponse” Queue, awaiting a response from SimpleMathMicroservice
  • SimpleMathMicroservice receives the message, and invokes Math.Functions.Double on the integer value 100
  • SimpleMathService publishes the result to “MathResponse”
  • ASP.NET application receives and returns the response to the browser.

Summary

In this example, we have provided a HTTP endpoint to access our SimpleMathMicroservice, and have abstracted SimpleMathMicroservice’ core logic, and applied Unit Testing to achieve sufficient coverage. This is an entry-level requirement in terms of building Microservices. The next step, which I will cover in Part 2, focuses on ensuring reliable message delivery.

Connect with me:

RSSGitHubTwitter
LinkedInYouTubeGoogle+